In this tutorial you will learn about the Laravel 5.8 Ajax Form Submit With Validation and its application with practical example.
Laravel 5.8 Ajax Form Submit With Validation
In this tutorial you’ll learn to validate and submit form data without reloading or refreshing of page using ajax. In this tutorial I’ll show you step by step how to submit and validate form data without reloading or refreshing of page using ajax. Generally Form validation is performed at server side, but can be performed at both the server and client side. In this laravel form validation tutorial we will be learning about laravel server side validations. In this tutorial, I’ll show you how to define laravel validation rules, how to validate form input and to display validation errors using ajax. In Laravel, to submit form data using ajax we must have to incorporate csrf token with form data and set X-CSRF-TOKEN request header with ajax form submit request.
Before starting with example I assume that you already have fresh laravel 5.8 installation ready, if you have not installed it yet you can follow laravel 5 installation instruction here.
Create Model and Migration
Now, we have to define table schema for contact table. Open terminal and let’s run the following command to generate a Contact model along with a migration file to create contact table in our database.
|
1 |
php artisan make:model Contact -m |
Once this command is executed you will find a migration file created under “database/migrations”. Lets open migration file created and put following code in it –
|
1 2 3 4 5 6 7 8 9 10 11 12 13 14 15 16 17 18 19 20 21 22 23 24 25 26 27 28 29 30 31 32 33 34 |
<?php use Illuminate\Support\Facades\Schema; use Illuminate\Database\Schema\Blueprint; use Illuminate\Database\Migrations\Migration; class CreateContactsTable extends Migration { /** * Run the migrations. * * @return void */ public function up() { Schema::create('contacts', function (Blueprint $table) { $table->bigIncrements('id'); $table->string('name'); $table->string('email'); $table->string('phone'); $table->timestamps(); }); } /** * Reverse the migrations. * * @return void */ public function down() { Schema::dropIfExists('contacts'); } } |
Run Laravel Migration
Now, run following command to migrate database schema.
|
1 |
php artisan migrate |
After, the migration executed successfully the contact table will be created in database.
Create Laravel Controller
Next, we have to create a controller to display contact form and to handle form validation and submit operations. Lets Create a controller named ContactController using command given below –
|
1 |
php artisan make:controller ajaxFormSubmitWithValidation/ContactController |
Once the above command executed, it will create a controller file ContactController.php in app/Http/Controllers/ajaxFormSubmitWithValidation directory.
Open the ajaxFormSubmitWithValidation/ContactController.php file and put the following code in it.
app/Http/Controllers/ajaxFormSubmitWithValidation/ContactController.php
|
1 2 3 4 5 6 7 8 9 10 11 12 13 14 15 16 17 18 19 20 21 22 23 24 25 26 27 28 29 30 31 |
<?php namespace App\Http\Controllers\ajaxFormSubmitWithValidation; use Illuminate\Http\Request; use App\Http\Controllers\Controller; use App\Contact; use Validator,Redirect,Response; class ContactController extends Controller { public function index() { return view('ajaxFormSubmitWithValidation.contact_form'); } public function store(Request $request) { $validator = Validator::make($request->all(), [ 'name' => 'required', 'email' => 'required|email', 'phone' => 'required|numeric' ]); $arr = array('msg' => 'Something went wrong. Please try again!', 'status' => false); if($validator->passes()){ $arr = array('msg' => 'Contact Added Successfully!', 'status' => true); } return Response()->json($arr); } } |
In this controller, we have following methods –
index() :- To display form.
store() :- To validate and submit form data.
Create Laravel View Files
In this step, we will create laravel view/blade file to perform display form and to show errors if any. Lets create a blade file “contact_form.blade.php” in “resources/views/ajaxFormSubmitWithValidation/” directory and put the following code in it respectively.
resources/views/ajaxFormSubmitWithValidation/contact_form.blade.php
|
1 2 3 4 5 6 7 8 9 10 11 12 13 14 15 16 17 18 19 20 21 22 23 24 25 26 27 28 29 30 31 32 33 34 35 36 37 38 39 40 41 42 43 44 45 46 47 48 49 50 51 52 53 54 55 56 57 58 59 60 61 62 63 64 65 66 67 68 69 70 71 72 73 74 75 76 77 78 79 80 81 82 83 84 85 86 87 88 89 90 91 92 |
<!doctype html> <html lang="en"> <head> <meta charset="utf-8"> <meta name="viewport" content="width=device-width, initial-scale=1, shrink-to-fit=no"> <meta name="csrf-token" content="{{ csrf_token() }}"> <title>Laravel 5.8 Ajax Form Submit with Validation - W3Adda</title> <link rel="stylesheet" href="https://cdnjs.cloudflare.com/ajax/libs/twitter-bootstrap/4.1.3/css/bootstrap.min.css" /> <script src="http://ajax.googleapis.com/ajax/libs/jquery/1.9.1/jquery.js"></script> <style> .error{ color:red; } </style> </head> <body> <div class="container"> <h2 style="margin-top: 10px;">Laravel 5.8 Ajax Form Submit with Validation - W3Adda</h2> <br> <br> <form id="contact_us" method="post" action="javascript:void(0)"> <div class="alert" id="msg_div" style="display:none"> <span id="res_message"></span> </div> <div class="form-group"> <label for="name">Name</label> <input type="text" name="name" class="form-control" id="name" placeholder="Please enter name"> <span class="text-danger">{{ $errors->first('name') }}</span> </div> <div class="form-group"> <label for="email">Email Id</label> <input type="text" name="email" class="form-control" id="email" placeholder="Please enter email id"> <span class="text-danger">{{ $errors->first('email') }}</span> </div> <div class="form-group"> <label for="phone">Phone</label> <input type="text" name="phone" class="form-control" id="phone" placeholder="Please enter mobile number" maxlength="10"> <span class="text-danger">{{ $errors->first('phone') }}</span> </div> <div class="form-group"> <button type="submit" id="send_form" class="btn btn-success">Submit</button> </div> </form> </div> <script> //----------------- $(document).ready(function(){ $('#send_form').click(function(e){ e.preventDefault(); $.ajaxSetup({ headers: { 'X-CSRF-TOKEN': $('meta[name="csrf-token"]').attr('content') } }); $('#send_form').html('Sending..'); $.ajax({ url: "{{ url('ajax-form-submit-validation')}}", method: 'post', data: $('#contact_us').serialize(), success: function(result){ $('#send_form').html('Submit'); if(result.status){ $('#res_message').html(result.msg); $('#msg_div').removeClass('alert-danger'); $('#msg_div').addClass('alert-success'); $('#msg_div').show(); $('#res_message').show(); }else{ $('#res_message').html(result.msg); $('#msg_div').removeClass('alert-success'); $('#msg_div').addClass('alert-danger'); $('#msg_div').show(); $('#res_message').show(); } document.getElementById("contact_us").reset(); setTimeout(function(){ $('#res_message').hide(); $('#msg_div').hide(); },1500); }}); }); }); //----------------- </script> </body> </html> |
Define Laravel Route
After this, we need to define routes in “routes/web.php” file. Lets open “routes/web.php” file and add the following routes in it.
routes/web.php
|
1 2 |
Route::get('ajax-form-submit-validation', 'ajaxFormSubmitWithValidation\ContactController@index'); Route::post('ajax-form-submit-validation', 'ajaxFormSubmitWithValidation\ContactController@store'); |
Start Development Server
Now we are ready to run our example so lets start the development server using following artisan command –
|
1 |
php artisan serve |
Now, open the following URL in browser to see the output –
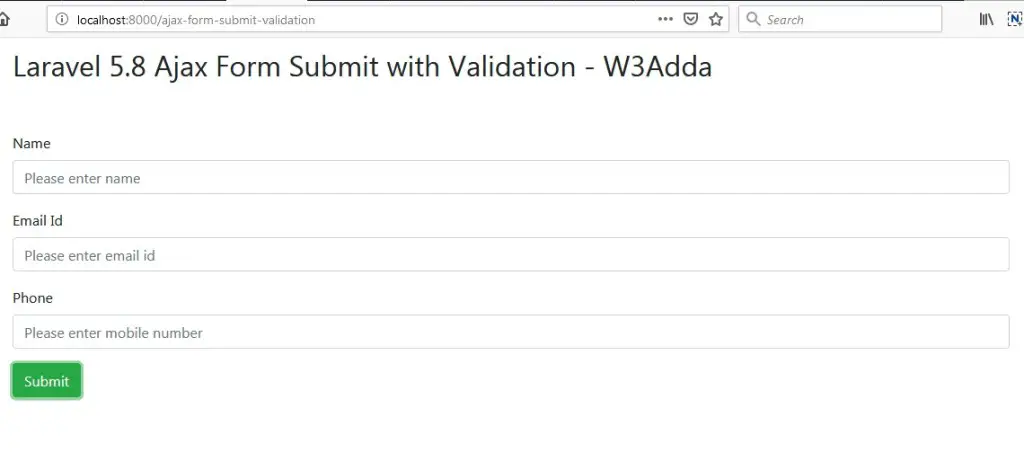
http://localhost:8000/ajax-form-submit-validation
Output 1:-

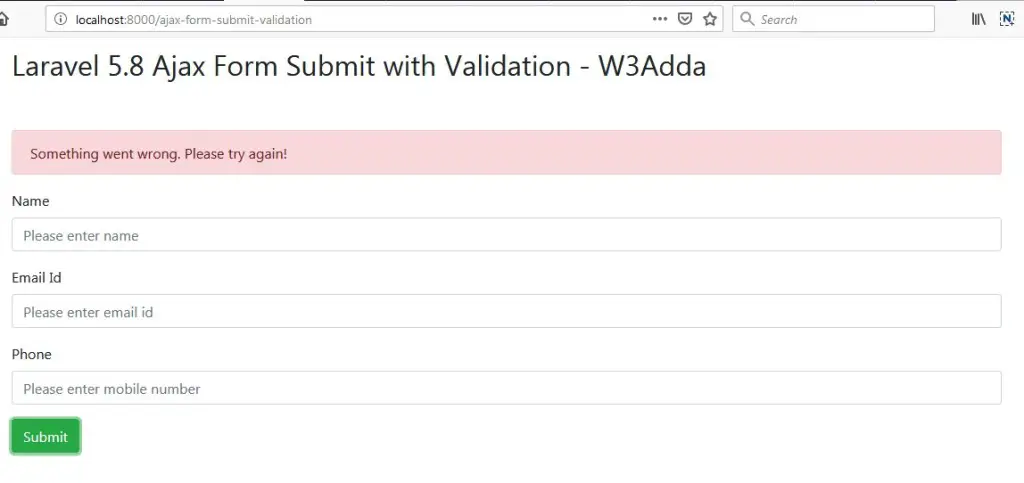
Output 2:-
Validate form data and display error messages.

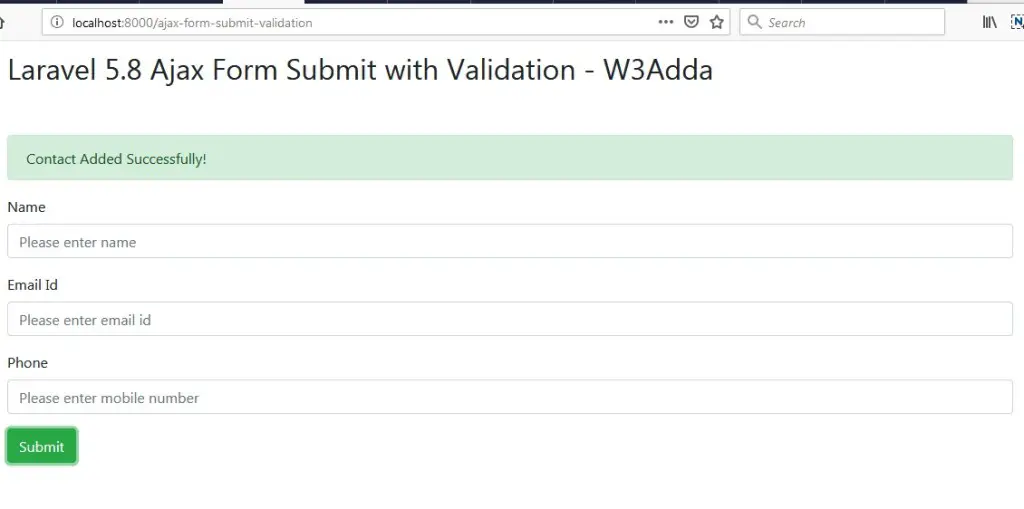
Output 3:-
Form data submitted successfully.


