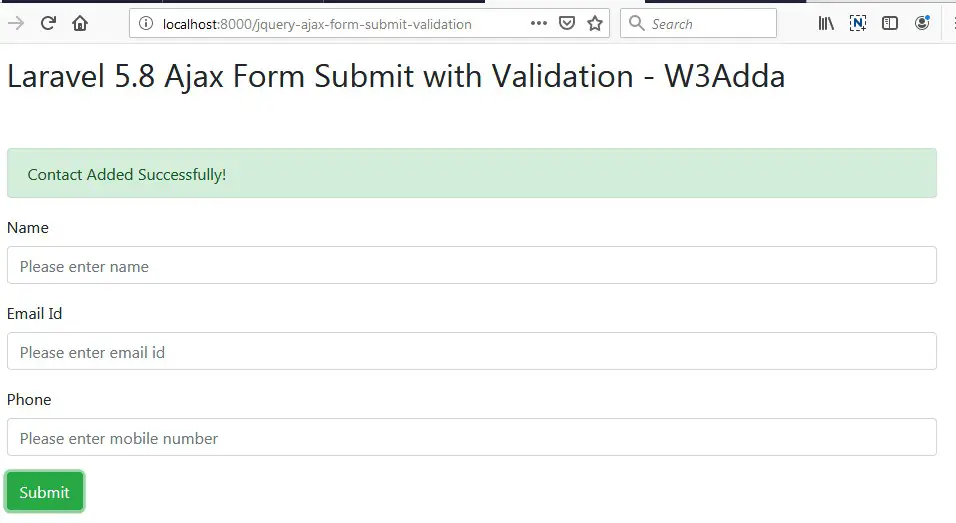
In this tutorial you will learn about the Laravel 5.8 jQuery Ajax Form Submit With Validation and its application with practical example.
Laravel 5.8 jQuery Ajax Form Submit With Validation
What Is Input Validation?
Input validation is a process where we check whether the input data provided by user or client is in correct format or not. If the input data fails to satisfy the validation rules then the user is responded with an error response code and the user is requested to resubmit the form with correct information. Generally Form validation is performed at server side, but can be performed at both the server and client side.
- Laravel 5.8 jQuery Ajax Form Submit With Validation
- What Is Input Validation?
- Laravel Ajax Form Submit
- Create Laravel 5.8 Application
- .env file
- Generate Application Key
- Set Default String Length
- Create Model and Migration
- Run Laravel Migration
- Create Laravel Controller
- Create Laravel View Files
- Add CSRF Meta and Set Ajax Headers
- Define Laravel Route
- Start Development Server
We will be using Jquery Form Validation plugin to validate the form in the client side, then input data is submitted to server where it will be validated against the server side validation rules.When the form data satisfies the validation at both the client and server side it will be inserted into the database.
Laravel Ajax Form Submit
In this Laravel jQuery Ajax Form Submit tutorial you’ll learn to validate and submit form data without reloading or refreshing of page using ajax. In this tutorial I’ll show you step by step how to submit a form without reloading or refreshing of page using ajax. In this example we will be using jquery form validation along with the jquery ajax submit handler for ajax form submission.
In this Laravel jQuery Ajax Form Submit example, I’ll show you how easily we can implement laravel validation with jquery ajax form submit request and can display laravel validation errors messages. In order to submit form data using ajax, we must have to incorporate csrf token with form data and set X-CSRF-TOKEN request header with ajax form submit request.
Before starting with example I assume that you already have fresh laravel 5.8 installation ready, if you have it installed then you can skip this step.
Create Laravel 5.8 Application
First of all we need to create a fresh laravel project, download and install Laravel 5.8 using the below command
1 |
composer create-project --prefer-dist laravel/laravel larablog |
Configure Database In .env file
Now, lets create a MySQL database and connect it with laravel application. After creating database we need to set database credential in application’s .env file.
.env
1 2 3 4 5 6 |
DB_CONNECTION=mysql DB_HOST=127.0.0.1 DB_PORT=3306 DB_DATABASE=larablog DB_USERNAME=root DB_PASSWORD= |
Generate Application Key
Open terminal and switch to the project directory and run the following command to generate application key and configure cache.
1 2 |
php artisan key:generate php artisan config:cache |
Set Default String Length
Locate the file “app/Providers/AppServiceProvider”, and add following line of code to the top of the file
1 |
use Illuminate\Support\Facades\Schema; |
and inside the boot method set a default string length as given below –
1 |
Schema::defaultStringLength(191); |
So this is how “app/Providers/AppServiceProvider” file looks like –
1 2 3 4 5 6 7 8 9 10 11 12 |
<?php namespace App\Providers; use Illuminate\Support\ServiceProvider; use Illuminate\Support\Facades\Schema; class AppServiceProvider extends ServiceProvider { public function boot() { Schema::defaultStringLength(191); } public function register(){ } } |
Create Model and Migration
Now, we have to define table schema for contact table. Open terminal and let’s run the following command to generate a Contact model along with a migration file to create contact table in our database.
1 |
php artisan make:model Contact -m |
Once this command is executed you will find a migration file created under “database/migrations”. Lets open migration file created and put following code in it –
1 2 3 4 5 6 7 8 9 10 11 12 13 14 15 16 17 18 19 20 21 22 23 24 25 26 27 28 29 30 31 32 33 34 |
<?php use Illuminate\Support\Facades\Schema; use Illuminate\Database\Schema\Blueprint; use Illuminate\Database\Migrations\Migration; class CreateContactsTable extends Migration { /** * Run the migrations. * * @return void */ public function up() { Schema::create('contacts', function (Blueprint $table) { $table->bigIncrements('id'); $table->string('name'); $table->string('email'); $table->string('phone'); $table->timestamps(); }); } /** * Reverse the migrations. * * @return void */ public function down() { Schema::dropIfExists('contacts'); } } |
Run Laravel Migration
Now, run following command to migrate database schema.
1 |
php artisan migrate |
After, the migration executed successfully the contact table will be created in database.
Create Laravel Controller
Next, we have to create a controller to display contact form and to handle form validation and submit operations. Lets Create a controller named ContactController using command given below –
1 |
php artisan make:controller ajaxFormSubmitValidation/ContactController |
Once the above command executed, it will create a controller file ContactController.php in app/Http/Controllers/ajaxFormSubmitValidation directory.
Open the ajaxFormSubmitValidation/ContactController.php file and put the following code in it.
app/Http/Controllers/ajaxFormSubmitValidation/ContactController.php
1 2 3 4 5 6 7 8 9 10 11 12 13 14 15 16 17 18 19 20 21 22 23 24 25 26 27 28 29 30 31 32 33 34 35 |
<?php namespace App\Http\Controllers\ajaxFormSubmitValidation; use Illuminate\Http\Request; use App\Http\Controllers\Controller; use App\Contact; use Validator,Redirect,Response; class ContactController extends Controller { // public function index() { return view('ajaxFormSubmitValidation.contact_form'); } public function store(Request $request) { request()->validate([ 'name' => 'required', 'email' => 'required|email', 'phone' => 'required' ]); $data = $request->all(); $result = Contact::insert($data); $arr = array('msg' => 'Something went wrong. Please try again!', 'status' => false); if($result){ $arr = array('msg' => 'Contact Added Successfully!', 'status' => true); } return Response()->json($arr); } } |
In this controller, we have following methods –
index() :- To display contact form.
store() :- To validate and submit form data,
Create Laravel View Files
In this step, we will create laravel view/blade file to perform display contact form. Lets create a blade file “contact_form.blade.php” in “resources/views/ajaxFormSubmitValidation/” directory and put the following code in it respectively.
resources/views/ajaxFormSubmitValidation/contact_form.blade.php
1 2 3 4 5 6 7 8 9 10 11 12 13 14 15 16 17 18 19 20 21 22 23 24 25 26 27 28 29 30 31 32 33 34 35 36 37 38 39 40 41 42 43 44 45 46 47 48 49 50 51 52 53 54 55 56 57 58 59 60 61 62 63 64 65 66 67 68 69 70 71 72 73 74 75 76 77 78 79 80 81 82 83 84 85 86 87 88 89 90 91 92 93 94 95 96 97 98 99 100 101 102 103 104 105 106 107 108 109 110 111 112 113 114 115 116 117 118 119 120 |
<!doctype html> <html lang="en"> <head> <meta charset="utf-8"> <meta name="viewport" content="width=device-width, initial-scale=1, shrink-to-fit=no"> <meta name="csrf-token" content="{{ csrf_token() }}"> <title>Laravel 5.8 Ajax Form Submit with Validation - W3Adda</title> <link rel="stylesheet" href="https://cdnjs.cloudflare.com/ajax/libs/twitter-bootstrap/4.1.3/css/bootstrap.min.css" /> <script src="http://ajax.googleapis.com/ajax/libs/jquery/1.9.1/jquery.js"></script> <script src="https://cdnjs.cloudflare.com/ajax/libs/jquery-validate/1.19.0/jquery.validate.js"></script> <script src="https://cdnjs.cloudflare.com/ajax/libs/jquery-validate/1.19.0/additional-methods.min.js"></script> <style> .error{ color:red; } </style> </head> <body> <div class="container"> <h2 style="margin-top: 10px;">Laravel 5.8 Ajax Form Submit with Validation - W3Adda</h2> <br> <br> <form id="contact_us" method="post" action="javascript:void(0)"> <div class="alert alert-success d-none" id="msg_div"> <span id="res_message"></span> </div> <div class="form-group"> <label for="name">Name</label> <input type="text" name="name" class="form-control" id="name" placeholder="Please enter name"> <span class="text-danger">{{ $errors->first('name') }}</span> </div> <div class="form-group"> <label for="email">Email Id</label> <input type="text" name="email" class="form-control" id="email" placeholder="Please enter email id"> <span class="text-danger">{{ $errors->first('email') }}</span> </div> <div class="form-group"> <label for="phone">Phone</label> <input type="text" name="phone" class="form-control" id="phone" placeholder="Please enter mobile number" maxlength="10"> <span class="text-danger">{{ $errors->first('phone') }}</span> </div> <div class="form-group"> <button type="submit" id="send_form" class="btn btn-success">Submit</button> </div> </form> </div> <script> if ($("#contact_us").length > 0) { $("#contact_us").validate({ rules: { name: { required: true, maxlength: 50 }, phone: { required: true, digits:true, minlength: 10, maxlength:12, }, email: { required: true, maxlength: 50, email: true, }, }, messages: { name: { required: "Please enter name", maxlength: "Name should be 50 characters long." }, phone: { required: "Please enter contact number", minlength: "The contact number should be 10 digits", digits: "Please enter only numbers", maxlength: "The contact number should be 12 digits", }, email: { required: "Please enter valid email", email: "Please enter valid email", maxlength: "The email name should less than or equal to 50 characters", }, }, submitHandler: function(form) { $.ajaxSetup({ headers: { 'X-CSRF-TOKEN': $('meta[name="csrf-token"]').attr('content') } }); $('#send_form').html('Sending..'); $.ajax({ url: "{{ url('jquery-ajax-form-submit-validation')}}" , type: "POST", data: $('#contact_us').serialize(), success: function( response ) { $('#send_form').html('Submit'); $('#res_message').show(); $('#res_message').html(response.msg); $('#msg_div').removeClass('d-none'); document.getElementById("contact_us").reset(); setTimeout(function(){ $('#res_message').hide(); $('#msg_div').hide(); },10000); } }); } }) } </script> </body> </html> |
Add CSRF Meta and Set Ajax Headers
Laravel comes with a security mechanism called csrf token. In Laravel, each of the request is attached a csrf_token that is validated before can be processed. In order to submit form data using ajax, we must have to incorporate csrf token with form data and set X-CSRF-TOKEN request header with ajax form submit request. This CSRF Token can generated using csrf_token() helper of laravel 5.
Add CSRF Token In Meta tag :-
1 |
<meta name="csrf-token" content="{{ csrf_token() }}"> |
Set CSRF Token In jQuery Ajax Header :-
1 2 3 4 5 |
$.ajaxSetup({ headers: { 'X-CSRF-TOKEN': $('meta[name="csrf-token"]').attr('content') } }); |
Define Laravel Route
After this, we need to define routes in “routes/web.php” file. Lets open “routes/web.php” file and add the following routes in it.
routes/web.php
1 2 |
Route::get('jquery-ajax-form-submit-validation', 'ajaxFormSubmitValidation\ContactController@index'); Route::post('jquery-ajax-form-submit-validation', 'ajaxFormSubmitValidation\ContactController@store'); |
Start Development Server
Now we are ready to run our example so lets start the development server using following artisan command –
1 |
php artisan serve |
Now, open the following URL in browser to see the output –
http://localhost:8000/jquery-ajax-form-submit-validation
Output 1:-
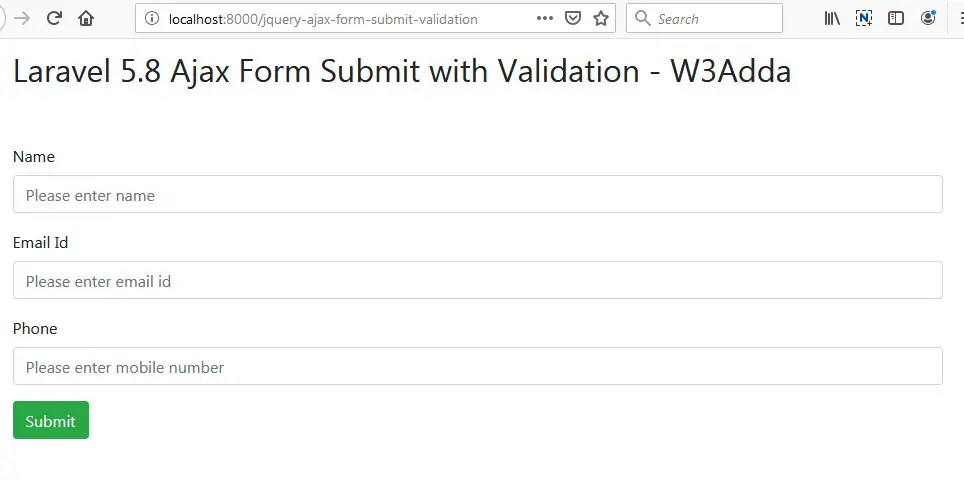
Output 2:-
Validate form data and display error messages.
Output 3:-
Form data submitted successfully.