In this tutorial you will learn about the Java Environment Setup and its application with practical example.
Java Environment Setup
Once the installation is done, you are required to set some of the following path variables in order to have the Java development environment configured properly.
Set Path Environment Variable
You are required to set the PATH environment variable in order to run any of the java executable (javac.exe, java.exe, javadoc.exe, and so on) from any directory.
Step 1:- Assuming that you have installed Java in the “C:\Program Files\Java\jdk1.8.0_91\bin” directory

Step 2:- Right-click on “My Computer” and select “Properties”
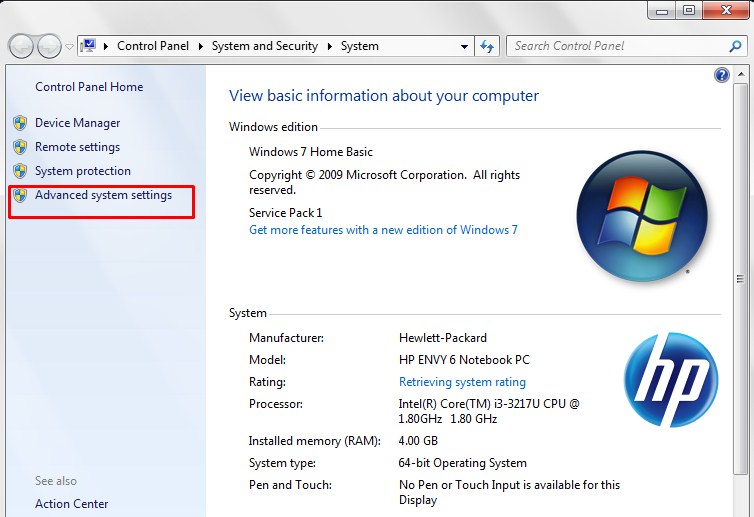
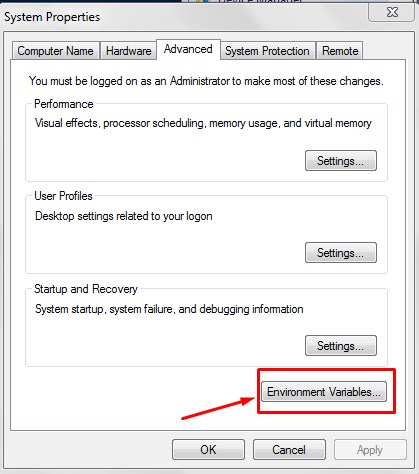
Step 3:- Click on the ‘Environment variables’ button under the ‘Advanced’ or “Advance system settings” tab.
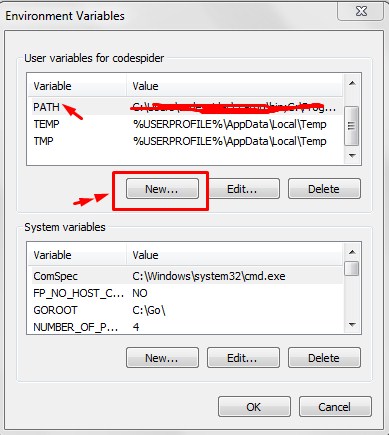
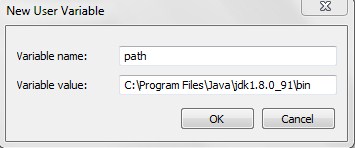
Step 4:- Now add or edit the ‘Path’ variable so that it also contains the java path as follows –
|
1 |
C:\Program Files\Java\jdk1.8.0_91\bin |
Set classpath Environment Variable
You are also required to set a classpath environment variable to specify the location for java class files in order to have the Java development environment configured properly. This variable actually specifies the location of the rt.jar file which is generally located at jdk\jre\lib.
Step 1:- Assuming that the rt.jar file is located in the “C:\Program Files\Java\jdk1.8.0_91\jre\lib” directory
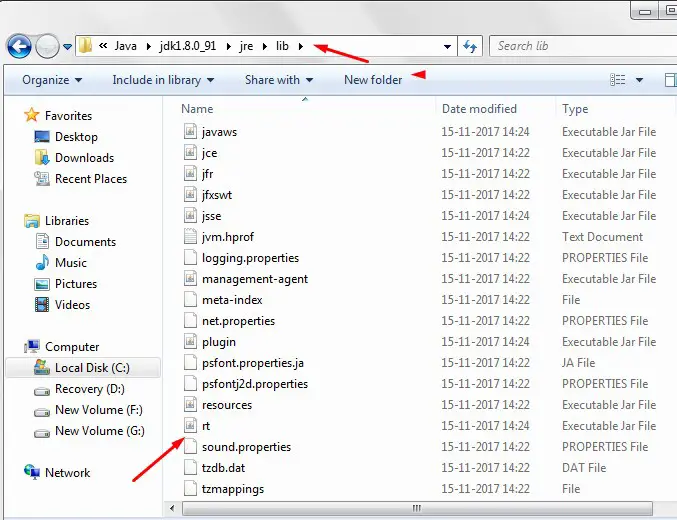
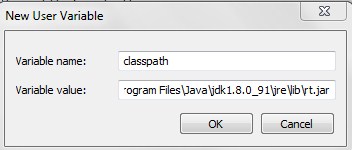
Step 2:- Let’s, open the environment variable window again and click on new to add a new path variable as “classpath” and put the complete path to C:\Program Files\Java\jdk1.8.0_91\jre\lib\rt.jar
Step 3:- Now, let’s open the terminal and run the following command in order to verify the classpath variable setting.
|
1 |
set classpath |


