In this tutorial you will learn about the ReactJS Forms and its application with practical example.
ReactJS Forms
Forms are integral part of any modern website or application. The forms are mainly used to allow users to interact with the application and it gives application a way to gather information from its users. Forms can be used to perform many tasks depending upon the nature of your business requirement and logic such as – user authentication, searching and filtering of products, booking a product/service, order submission etc.
Creating a Form
When it comes to form-building, React offers a stateful, reactive approach for form building. In React, the form data is usually handled by the component rather than the DOM, and is usually implemented using controlled components.
Uncontrolled Component
The traditional HTML forms has the default HTML form behavior, the form data is usually stored in DOM. The HTML Elements like <input>, <select>, and <textarea> maintains their own state, which is updated when the input value changes. and input field value can be accessed using using a ref.
Example:-
|
1 2 3 4 5 6 7 |
<form> <label> Name: <input type="text" name="name" /> </label> <input type="submit" value="Submit" /> </form> |
Here, when form is submitted the form data being sent to another page request
Controlled Components
In controlled component the form data is usually handled by the component rather than the DOM, the container component is responsible to maintain the state.
In controlled component callback functions being used to handle form events and to maintain forms data using components local state. This way component have better control over the form elements and the form data.
Example:-
Step 1:- Let’s open src/App.js, delete the existing code and put the following code in it and save it.
|
1 2 3 4 5 6 7 8 9 10 11 12 13 14 15 16 17 18 19 20 21 22 23 24 25 26 27 28 29 30 31 32 33 34 35 36 37 |
import React, { Component } from 'react'; class App extends React.Component { constructor(props) { super(props); this.state = {value: ''}; this.handleChange = this.handleChange.bind(this); this.handleSubmit = this.handleSubmit.bind(this); } handleChange(event) { this.setState({value: event.target.value}); } handleSubmit(event) { alert('Name: ' + this.state.value); event.preventDefault(); } render() { return ( <div> <h1>W3Adda - ReactJS Forms</h1> <form onSubmit={this.handleSubmit}> <label> Name: <input type="text" value={this.state.value} onChange={this.handleChange} /> </label> <input type="submit" value="Submit" /> </form> </div> ); } } export default App; |
Step 2:- Let’s open the terminal again, change directory to your project folder and type the following command in order to run the server.
|
1 |
npm start |
Step 3:- Now open the following URL in browser to view the output
http://localhost:3000
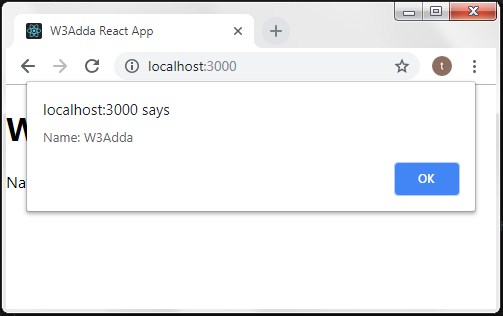
Step 4:- You will see the following screen.
Screen 1:-

Screen 2:-


