
In this tutorial you will learn about the Servlet on Netbeans and its application with practical example.
Servlet on Netbeans
We have discussed servlet methods and also seen some example of Servlet in our previous article. Now let’s create a simple project in Netbeans IDE and understand Servlet step by step.
Step 1:- First we need to create a project so click on File in netbeans as like below image.

Step 2:- In Second step you have to click on New Project and then need to on Java Web after that select Web Application as like below image.

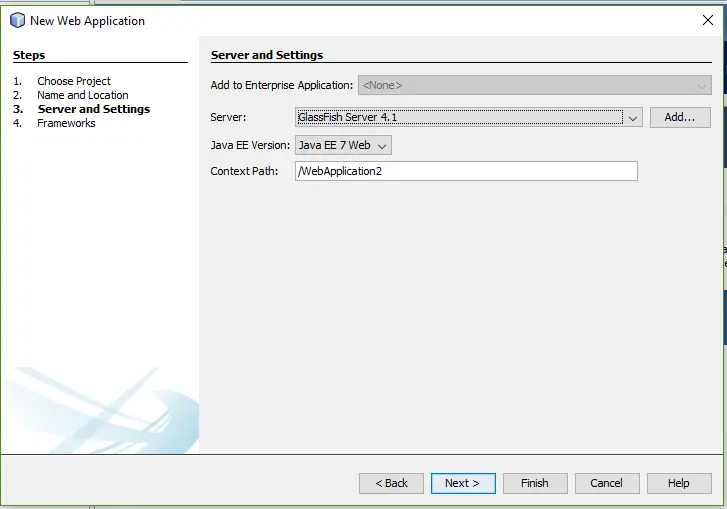
Step 3:- After selecting Name and Location of Project, you have to click on Next And then Finish. Check below image for reference.
Step 4:- You will get default index.html file. We will do some modification in this file later. In this step we will create servlet, for this please check below images.
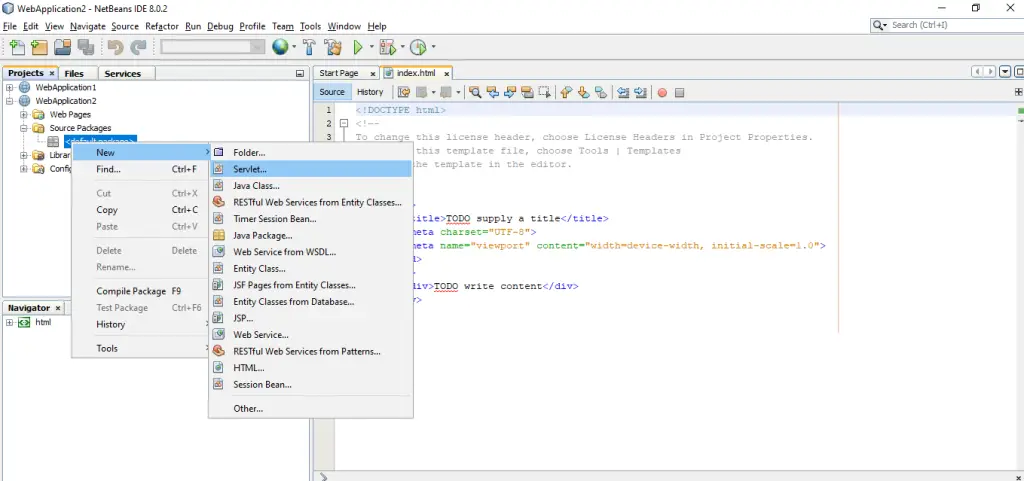
Do right click on default Package and then select Servlet. You will get screen like below image.
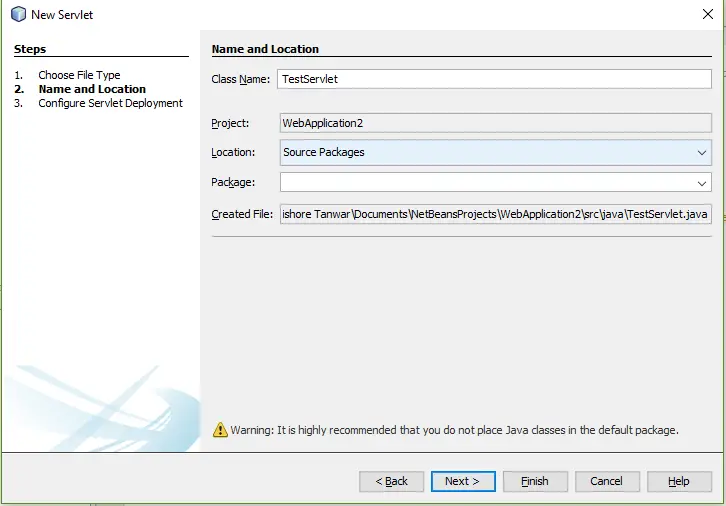
Enter Your Servlet Name and then click Next. Check below Image.
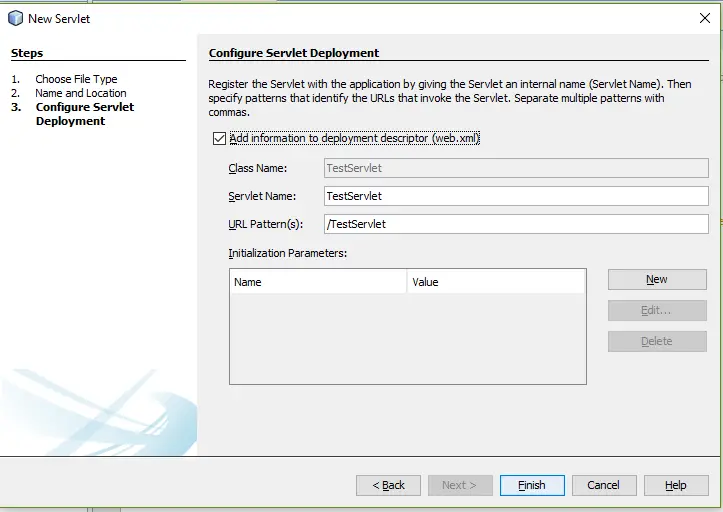
Note: Make Sure you have clicked on check box because it use for declare your servlet in web.xml file. We are all set with Servlet creation. Click on Finish.
Step 5:- Index.html: This file will be our welcome file, on click button it will redirect to our TestServlet.java class. Check below code.
Output :-
This file output will look like below image.

Step 6:-
TestServlet.java: This is our Test Servlet class, Please check below code.
Output :-
So we are done with this example, have a look to output image.

