In this tutorial you will learn about the Struts 2 Adding Plugin and its application with practical example.
In this article we are going to add Struts2 Plugin in NetBeans IDE. Follow the below Steps
Step 1:- First we have to download struts2 from netbeans site. Below is the link from where you can download .
|
1 |
http://plugins.netbeans.org/plugin/39218/struts2-support-repack-for-nb-7-0 |

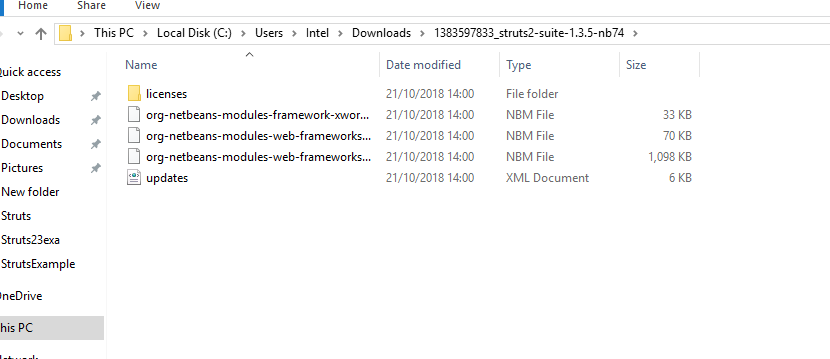
Step 2:- In this step we will have to extract this zip file like below image.

Step 3:- Start Your NetBeans, and go to Tools->Plugins Like below image.

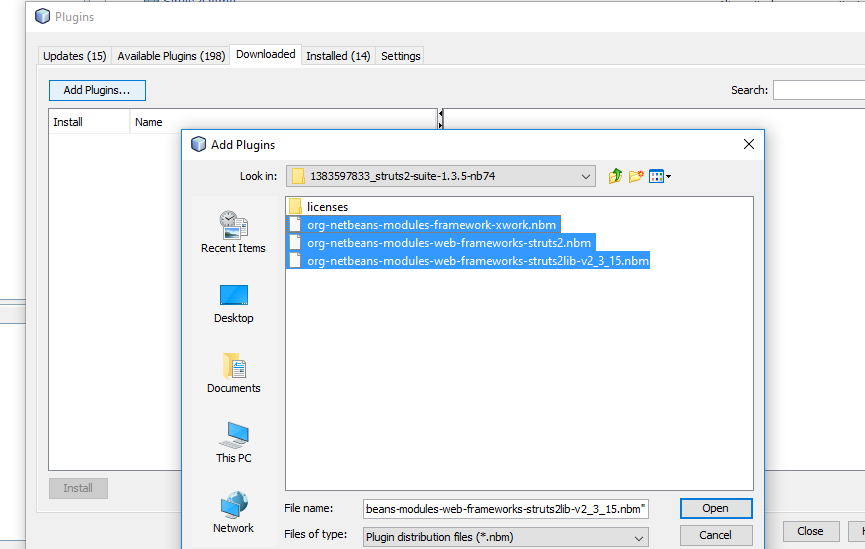
Step 4:- After clicking Plugins, Go to download and then click on “Add Plugins…” , find the path where you have extracted that zip file and then select files like below image and click on Open.

Step 5:- In this step you will get list of downloaded plugins, simply check all and click on install like below image.

Step 6:- In this step , this will inform you that these are the plugins which are going to install, simply click on “Next” to proceed.

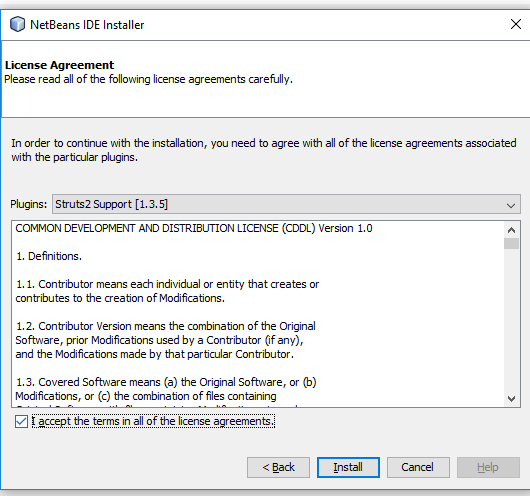
Step 7:- Last step for installing , this step will ask you to accept the “License Agreement”, check the condition and click on “Install”. Check below image.

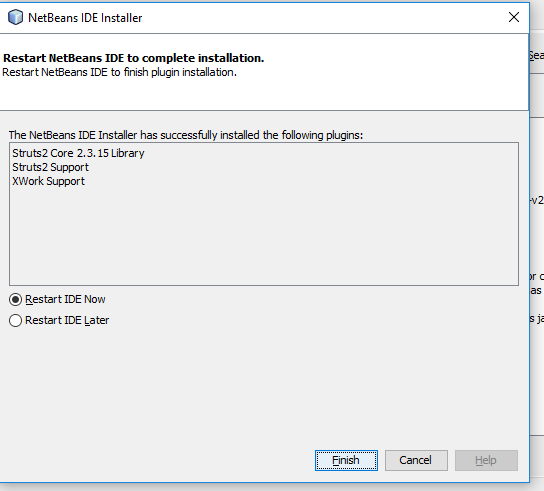
Step 8:- After installing All Plugins, Next step will ask you for “Restart IDE Now” or “Later” , Please restart it so that it can make changes.

Step 9:- This is our last step in which you can check our installed plugins. Check below image and also your IDE.

We are done with installing Struts2 plugin in our IDE. Now We will create HelloWorld Project in our next article.

